
Connect Your AWS Account
1. Watch a quick explanation on how to connect
The scanner creates a read-only cross-account role in your account. This role uses the AWS managed SecurityAudit policy. We will be able to read the information about your configuration but cannot see or access your data.

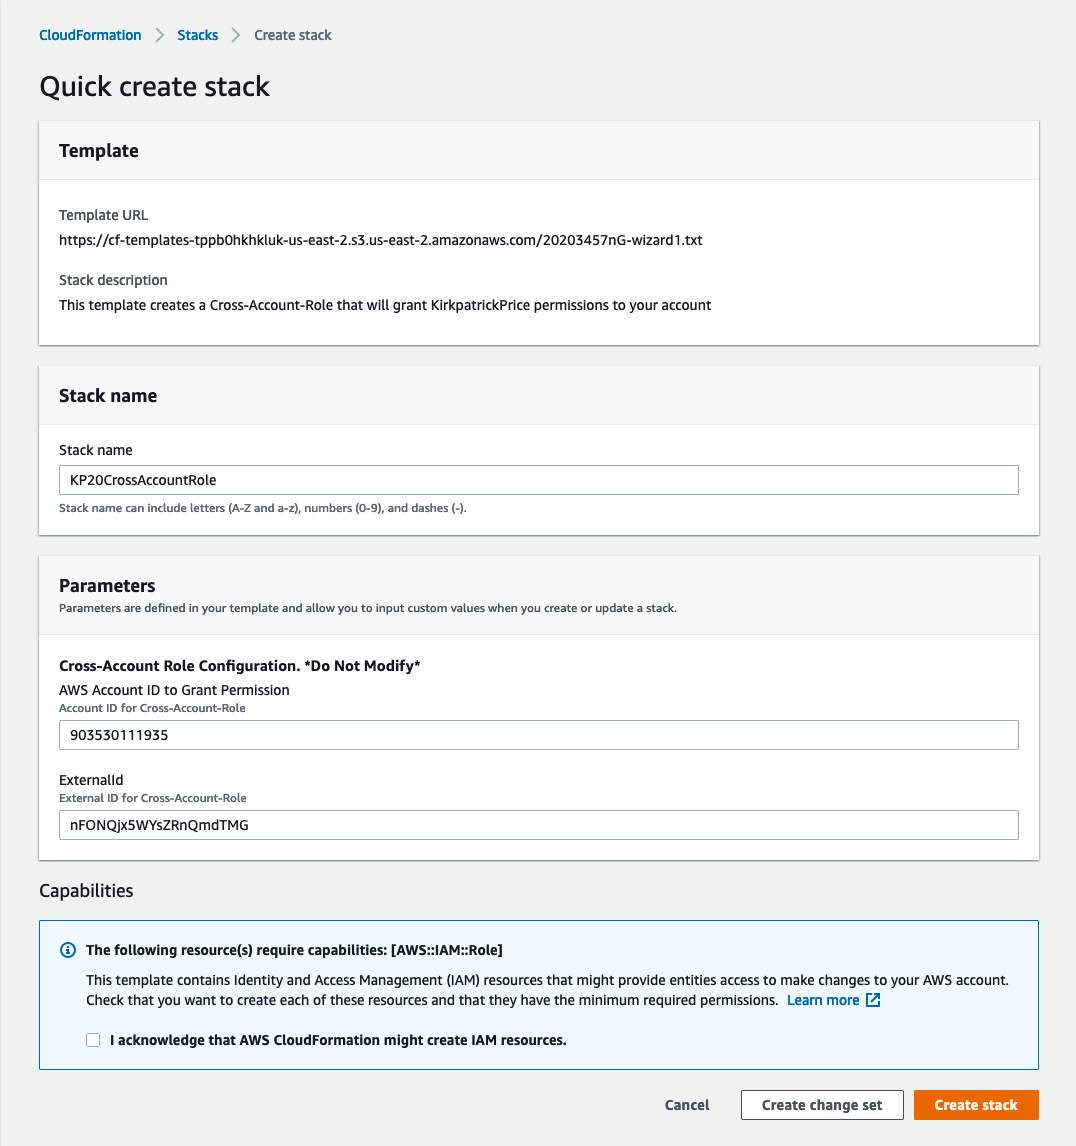
2. Launch CloudFormation stack
This will perform the following:
- A new cross-account role will be created in your account. Our scanner will assume this role to assess your environment.
- The AWS SecurityAudit policy will be attached to the new role. This grants read-only access to the metadata of your AWS services.
3. Copy and paste the Role ARN
Once the stack is finished, you can click on the Outputs tab in the CloudFormation page and copy the new Role ARN to your clipboard.
Paste the generated Role ARN into the field below and click Connect Account.

You can manually connect your AWS account by creating a role and assigning the SecurityAudit policy yourself.
1. Create a New Role
- Log in to the AWS Management Console and launch the IAM Console.
- In the navigation pane on the left, select Roles.
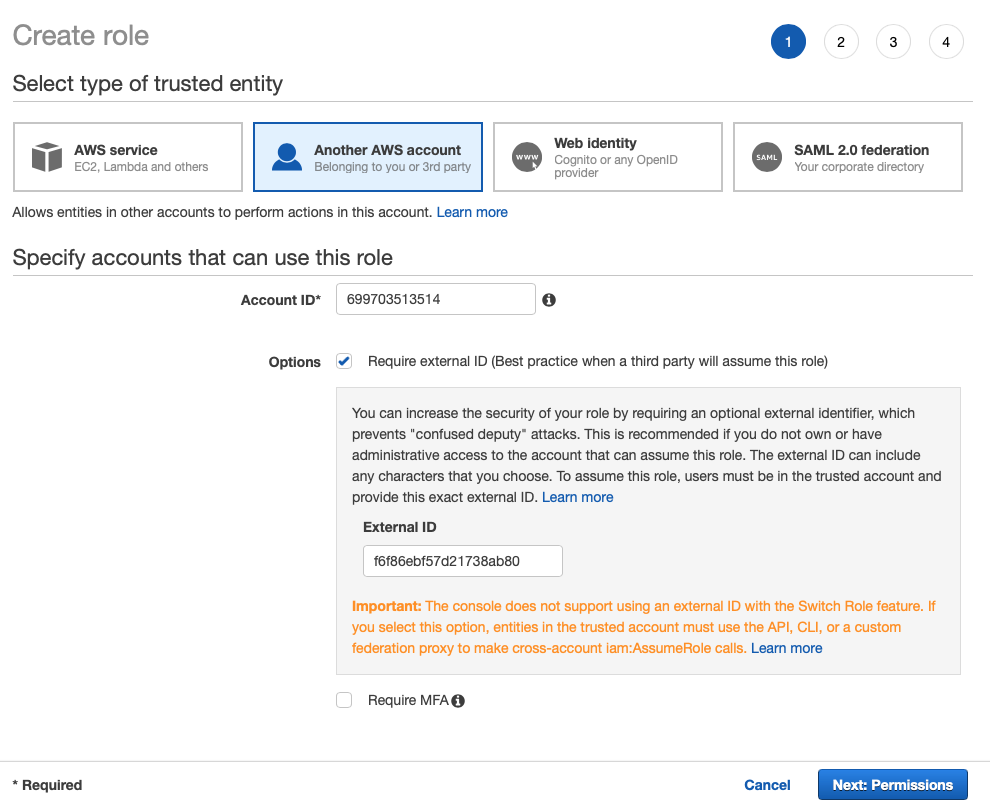
- Select Create role.
- Under Select type of trusted entity, select Another AWS account.
- In the Account ID field, copy and paste the Account ID value from the KirkpatrickPrice Connect AWS Account modal.
This is the scanner Account ID. By doing this you will allow the scanner account to assume this role in your account.
- Select the Require external ID box and then enter any value into the External ID text field.
The scanner will be required to provide this external ID when assuming your role.
- Select Next: Permissions.
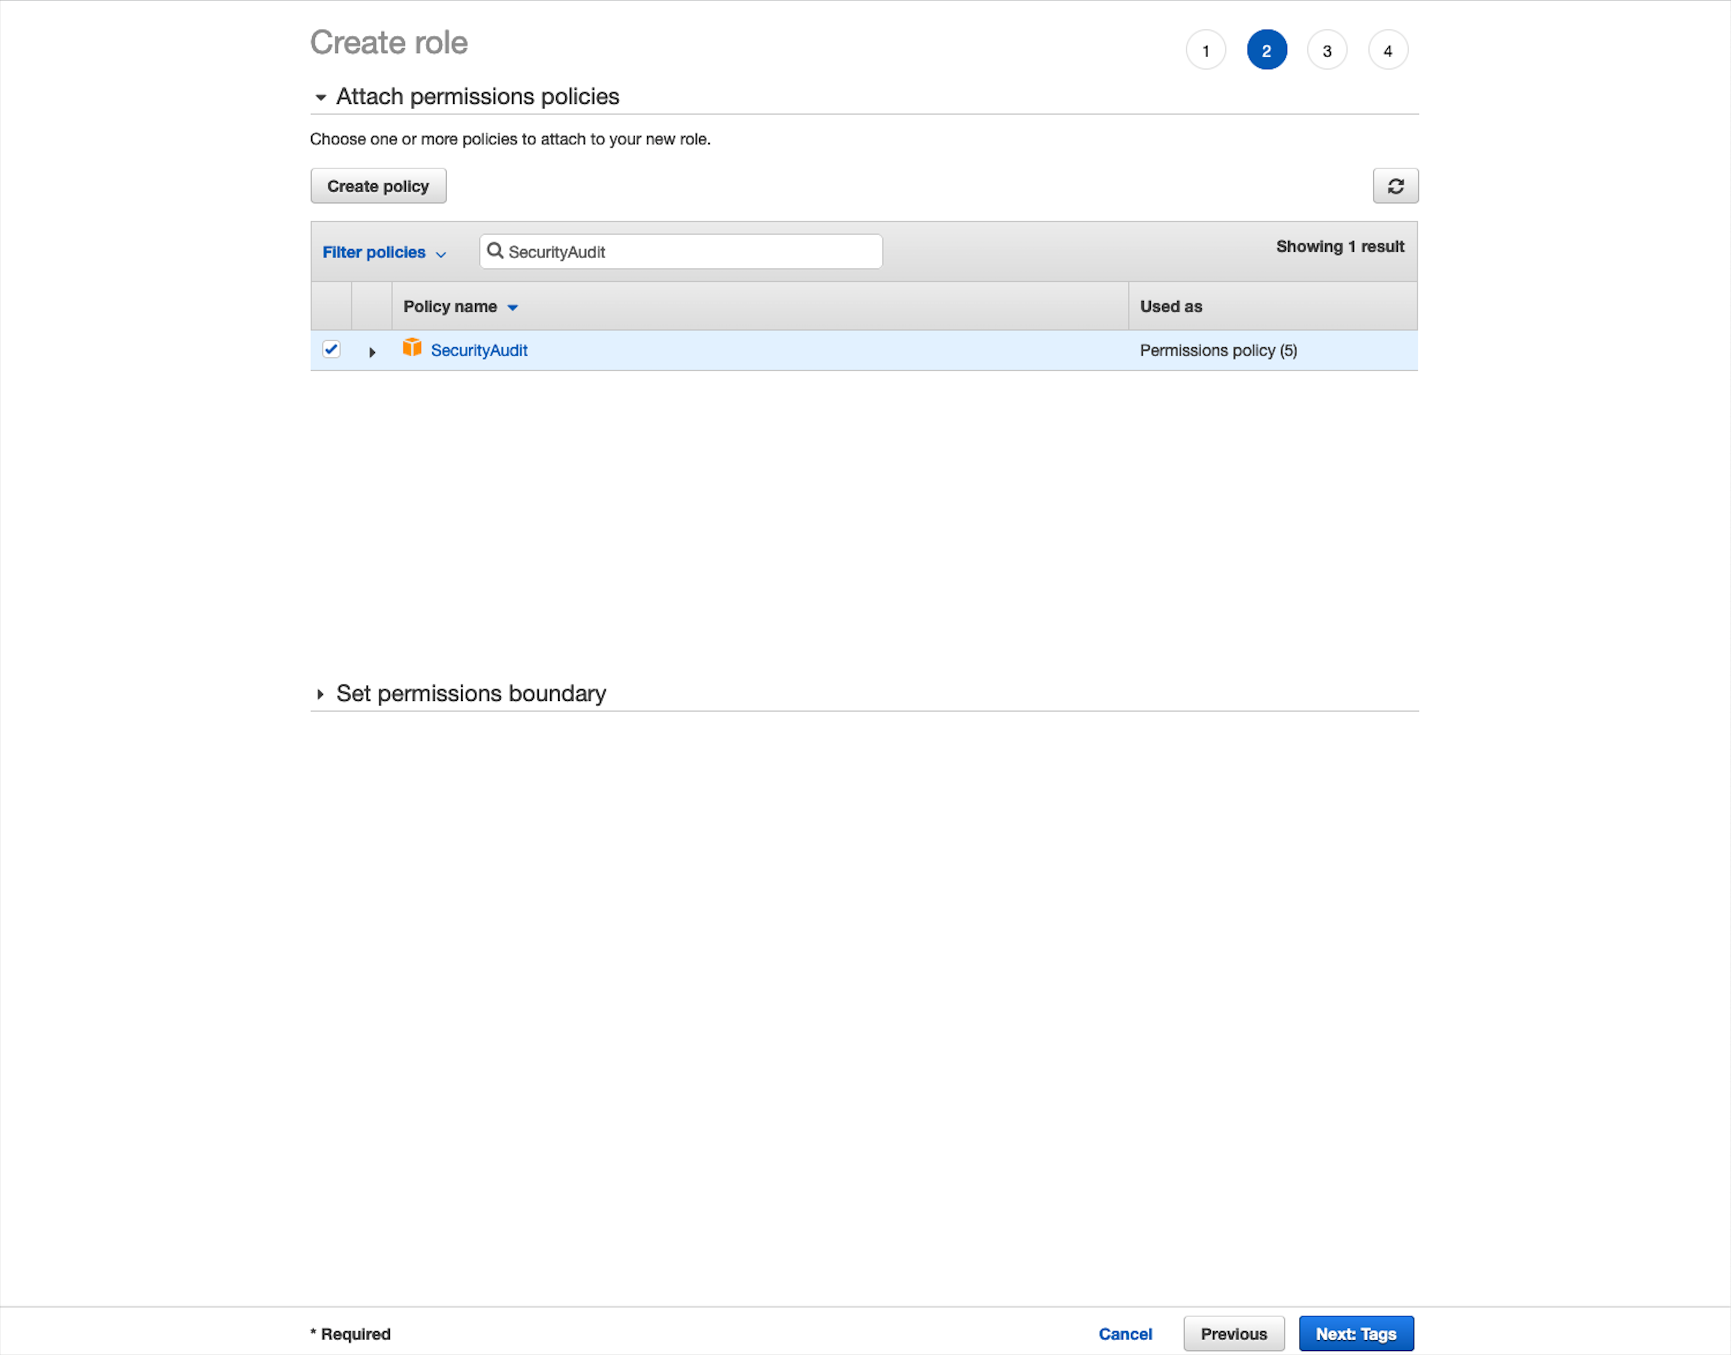
2. Attach the SecurityAudit Policy
This allows the scanner to have read-only access to perform a scan, you will need to attach the SecurityAudit policy to your new role.
- In the search field, enter “SecurityAudit.”
- Select the SecurityAudit policy box, then select Next: Tags.
- Optional: Add any desired tags to your new role, then select Next: Review.
- In the Role name text field, enter any role name.
Optional: In the Role description text field, provide a description of your new role.
- Select Create Role.
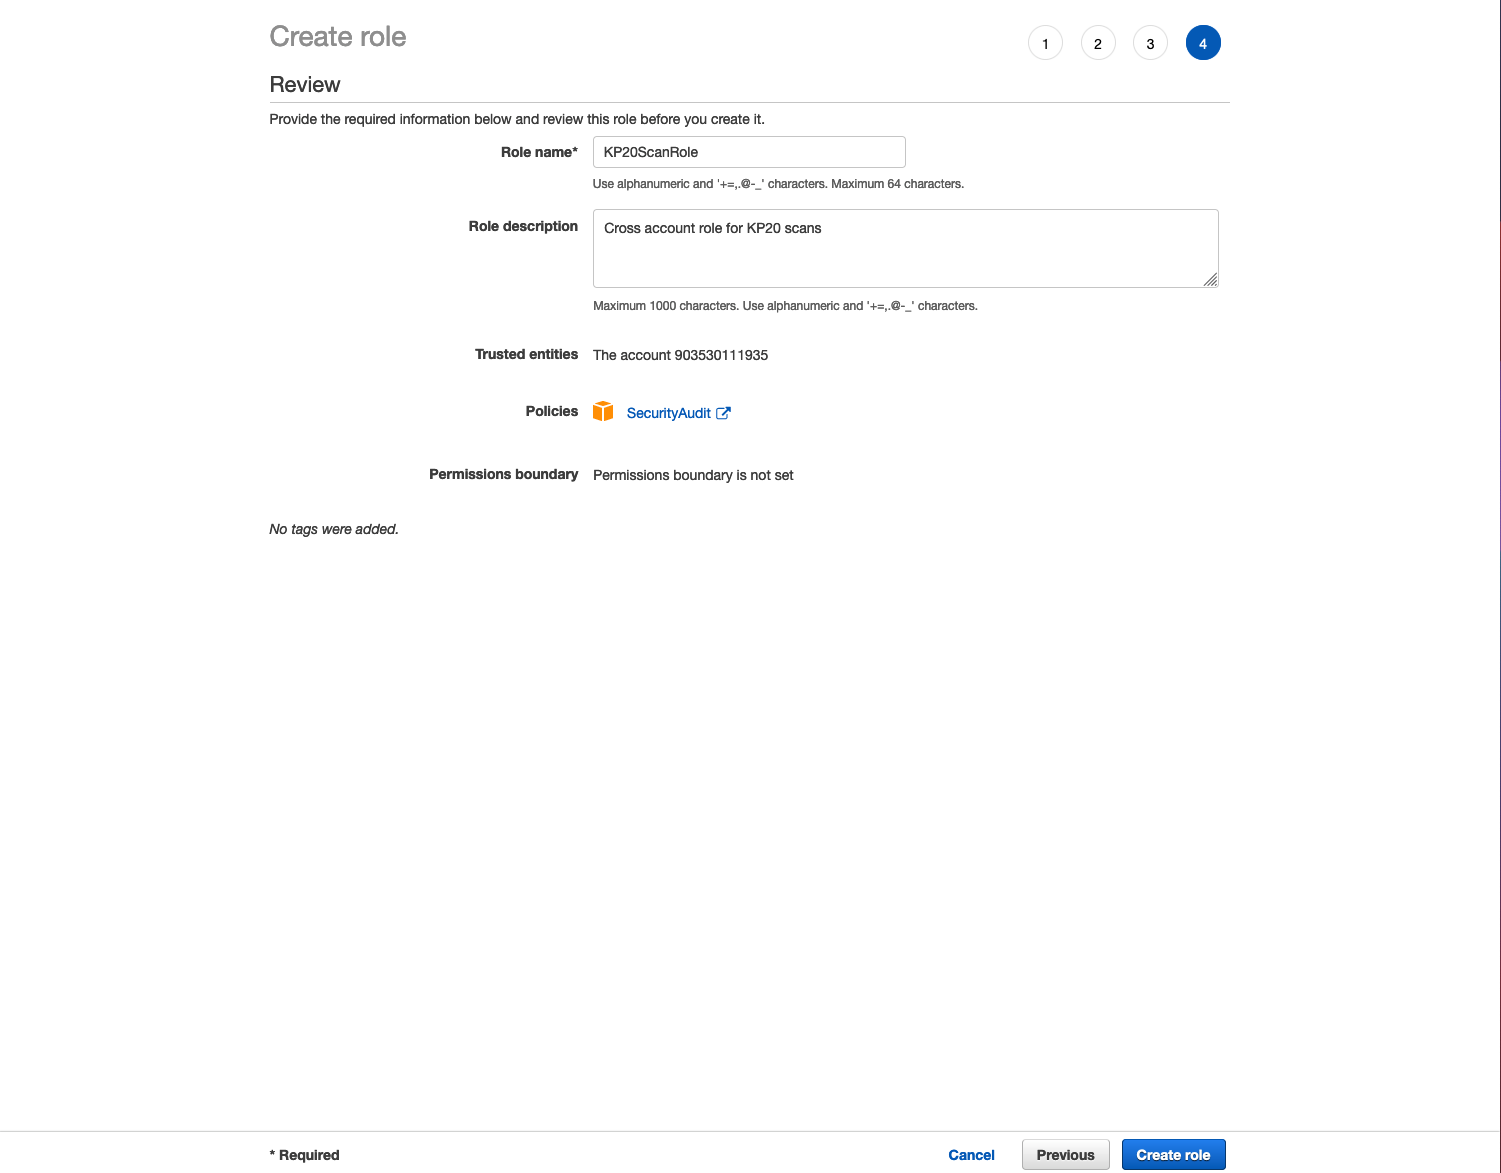
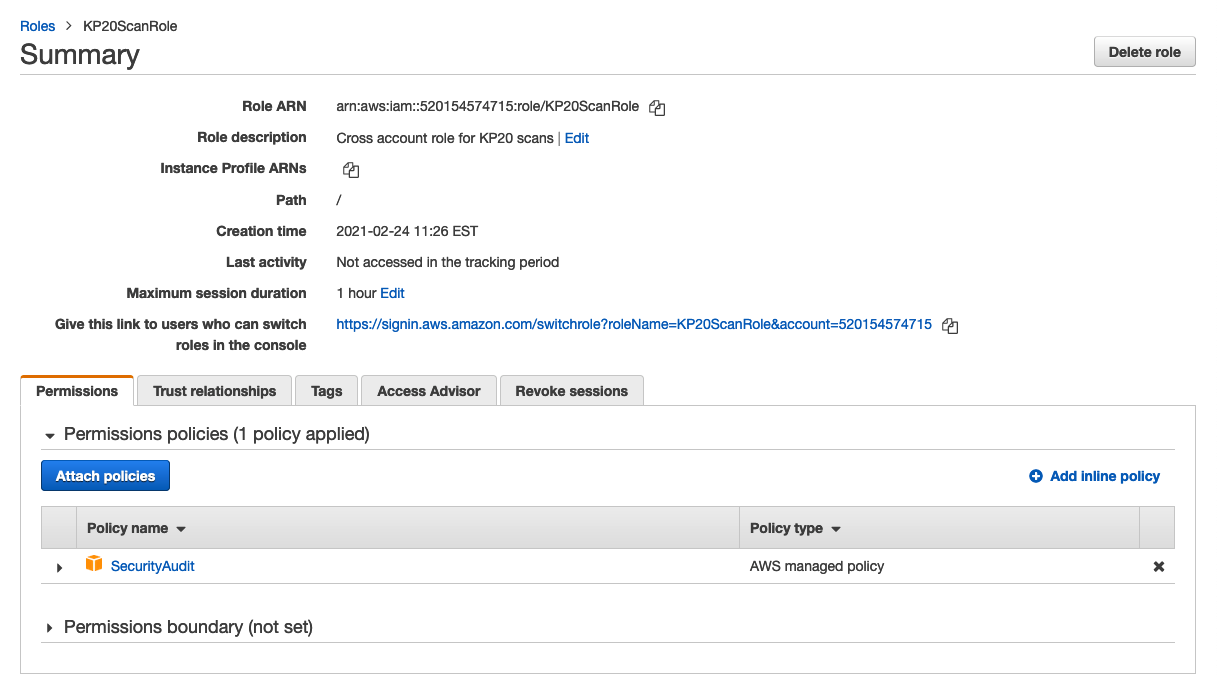
- From the list of Role names, select your newly created role.
- At the top of the page, copy the Role ARN value to your clipboard.
3. Enter your Credentials
- Return to the Connect AWS Account – Manual modal on the KirkpatrickPrice AWS Scanner site.
- In the Role ARN text field, paste your copied Role ARN.
- In the External ID text field, enter the External ID that was assigned when creating the role.
You can find this value by selecting the role name and selecting the Trust relationships tab. The value is listed under Conditions.
- Select Connect Account.