Connect Azure Account
These steps walk through setting up access for our scanner in the Azure Portal.
1. Create Azure Application
- Log into the Azure portal.
- Using the portal menu, navigate to Microsoft Entra ID.
- Select App Registrations from the menu on the left.
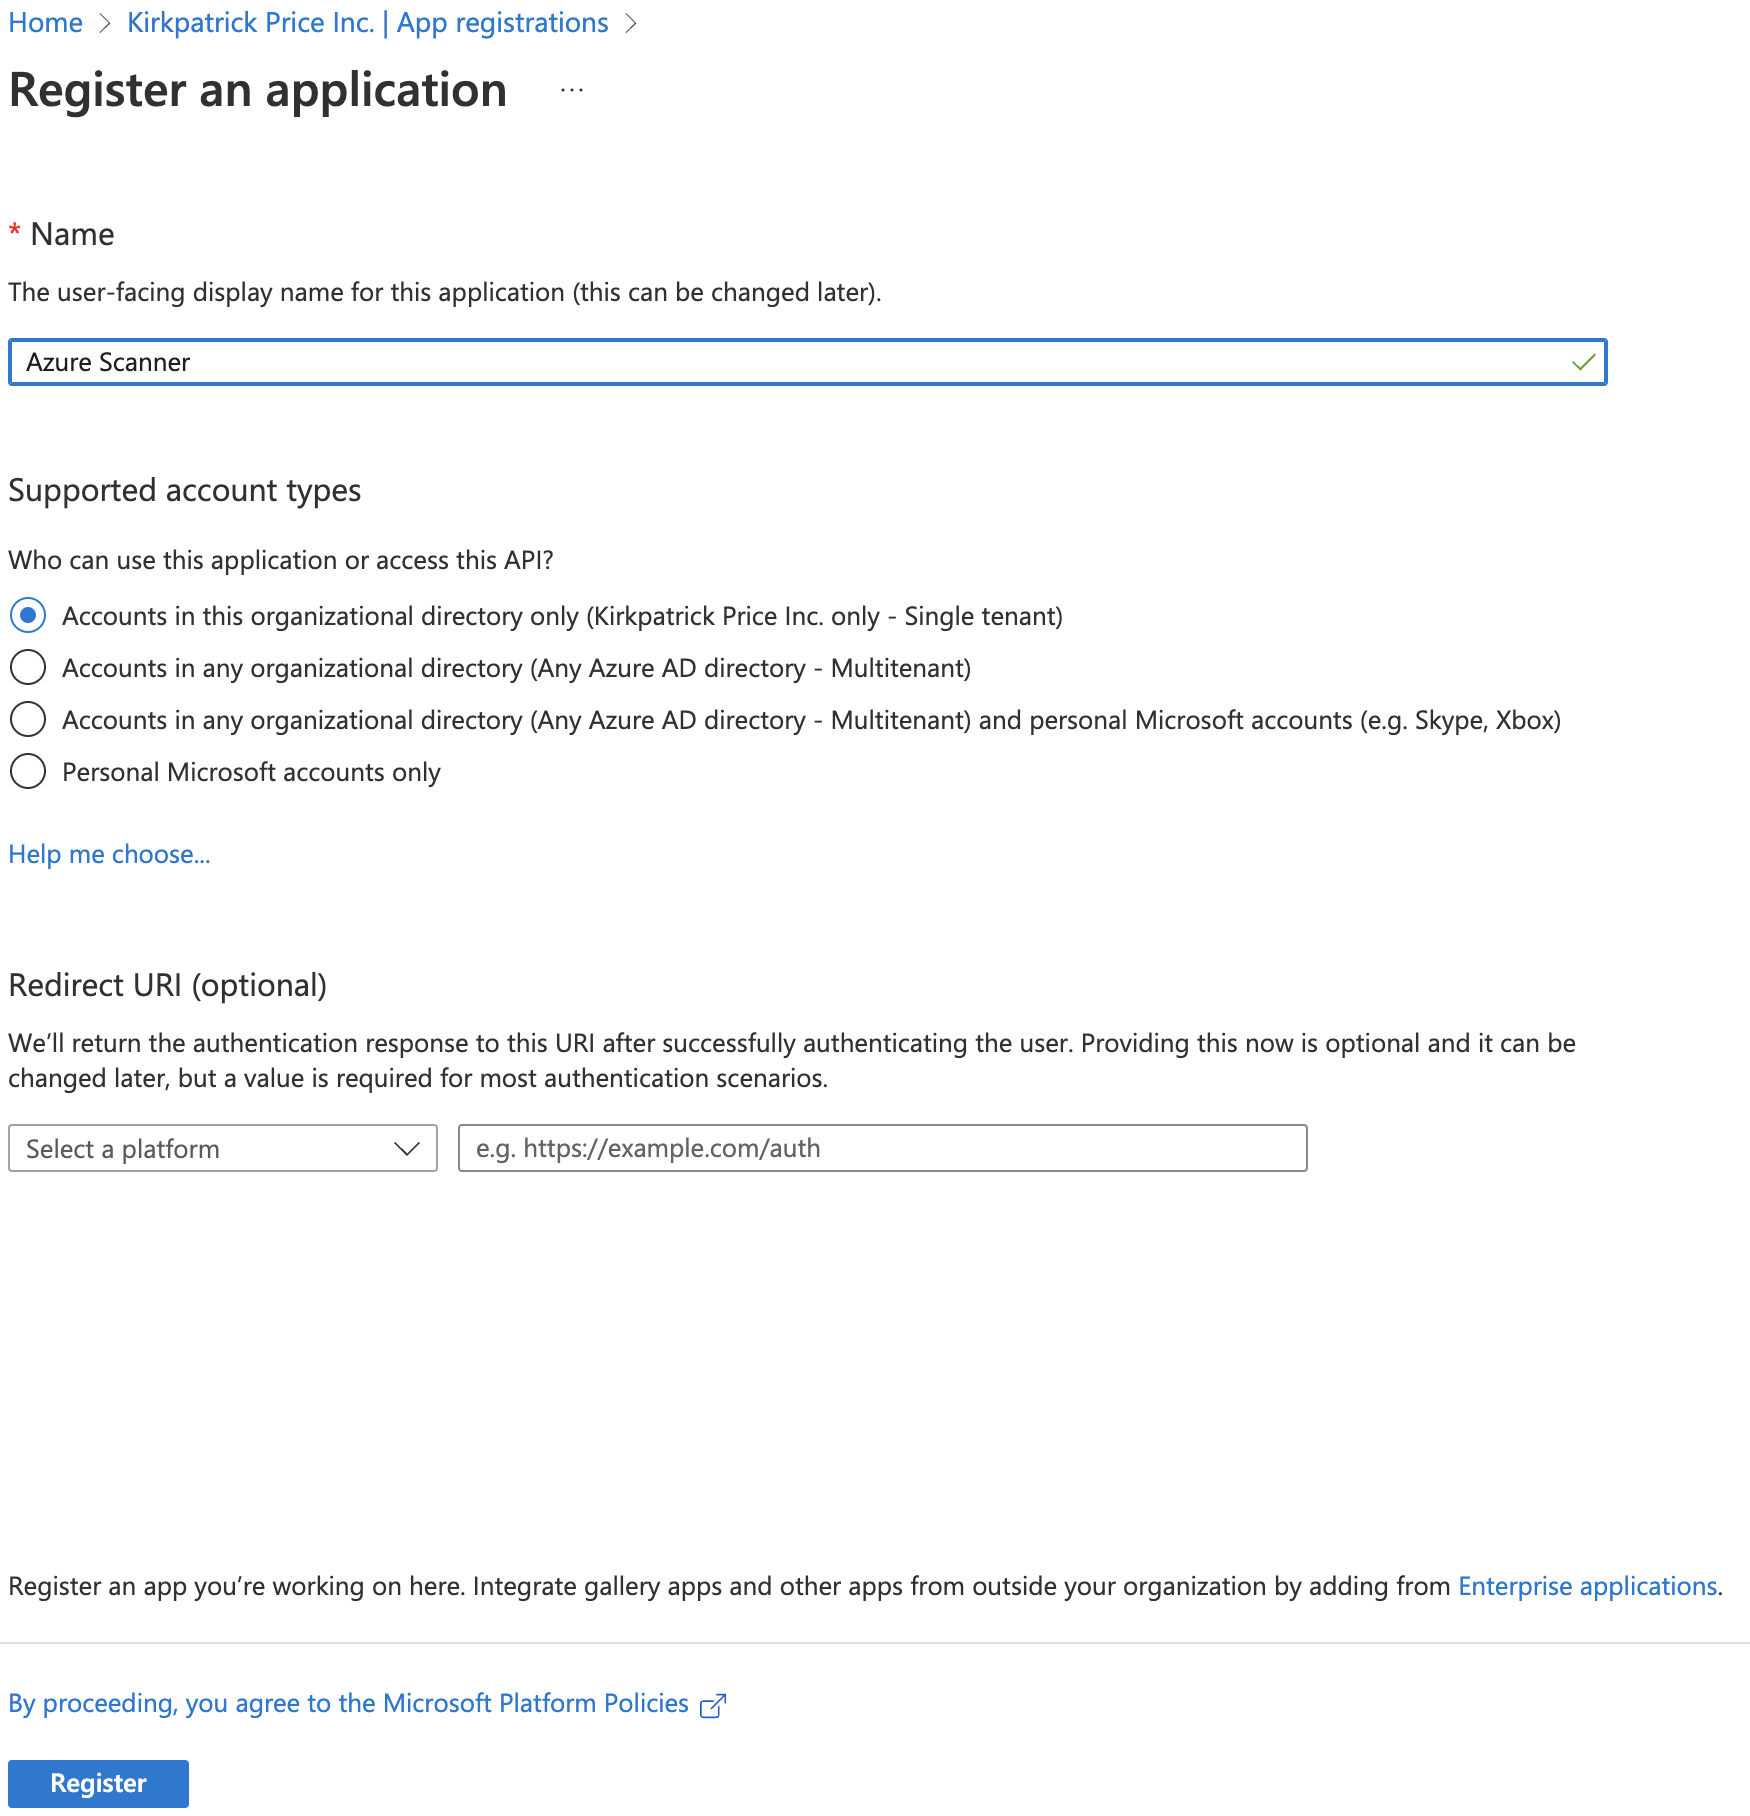
- Click on + New Registration near the top of the menu.
- Enter Azure Scanner in the Name field.
- Under the "Supported account types" section, select Accounts in this organizational directory only (YOUR_APP_NAME only - Single tenant)
- Click on Register.
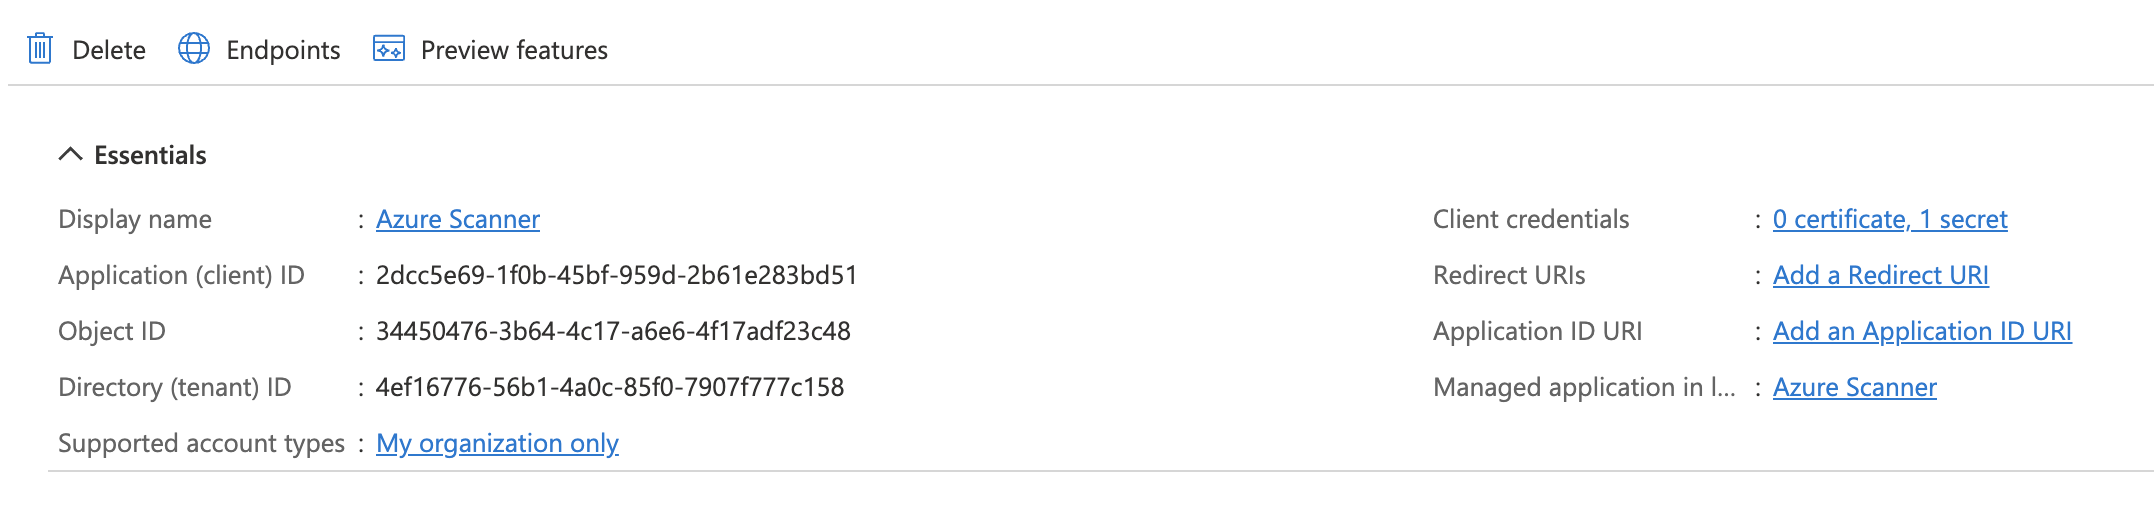
- Copy the Application (client) ID to your clipboard and enter it in the Application (client) ID field on the KirkpatrickPrice Connect Azure Account modal.
- Copy the Directory (tenant) ID to your clipboard and enter it in the Directory (tenant) ID field on the KirkpatrickPrice Connect Azure Account modal.
2. Add Client Secret
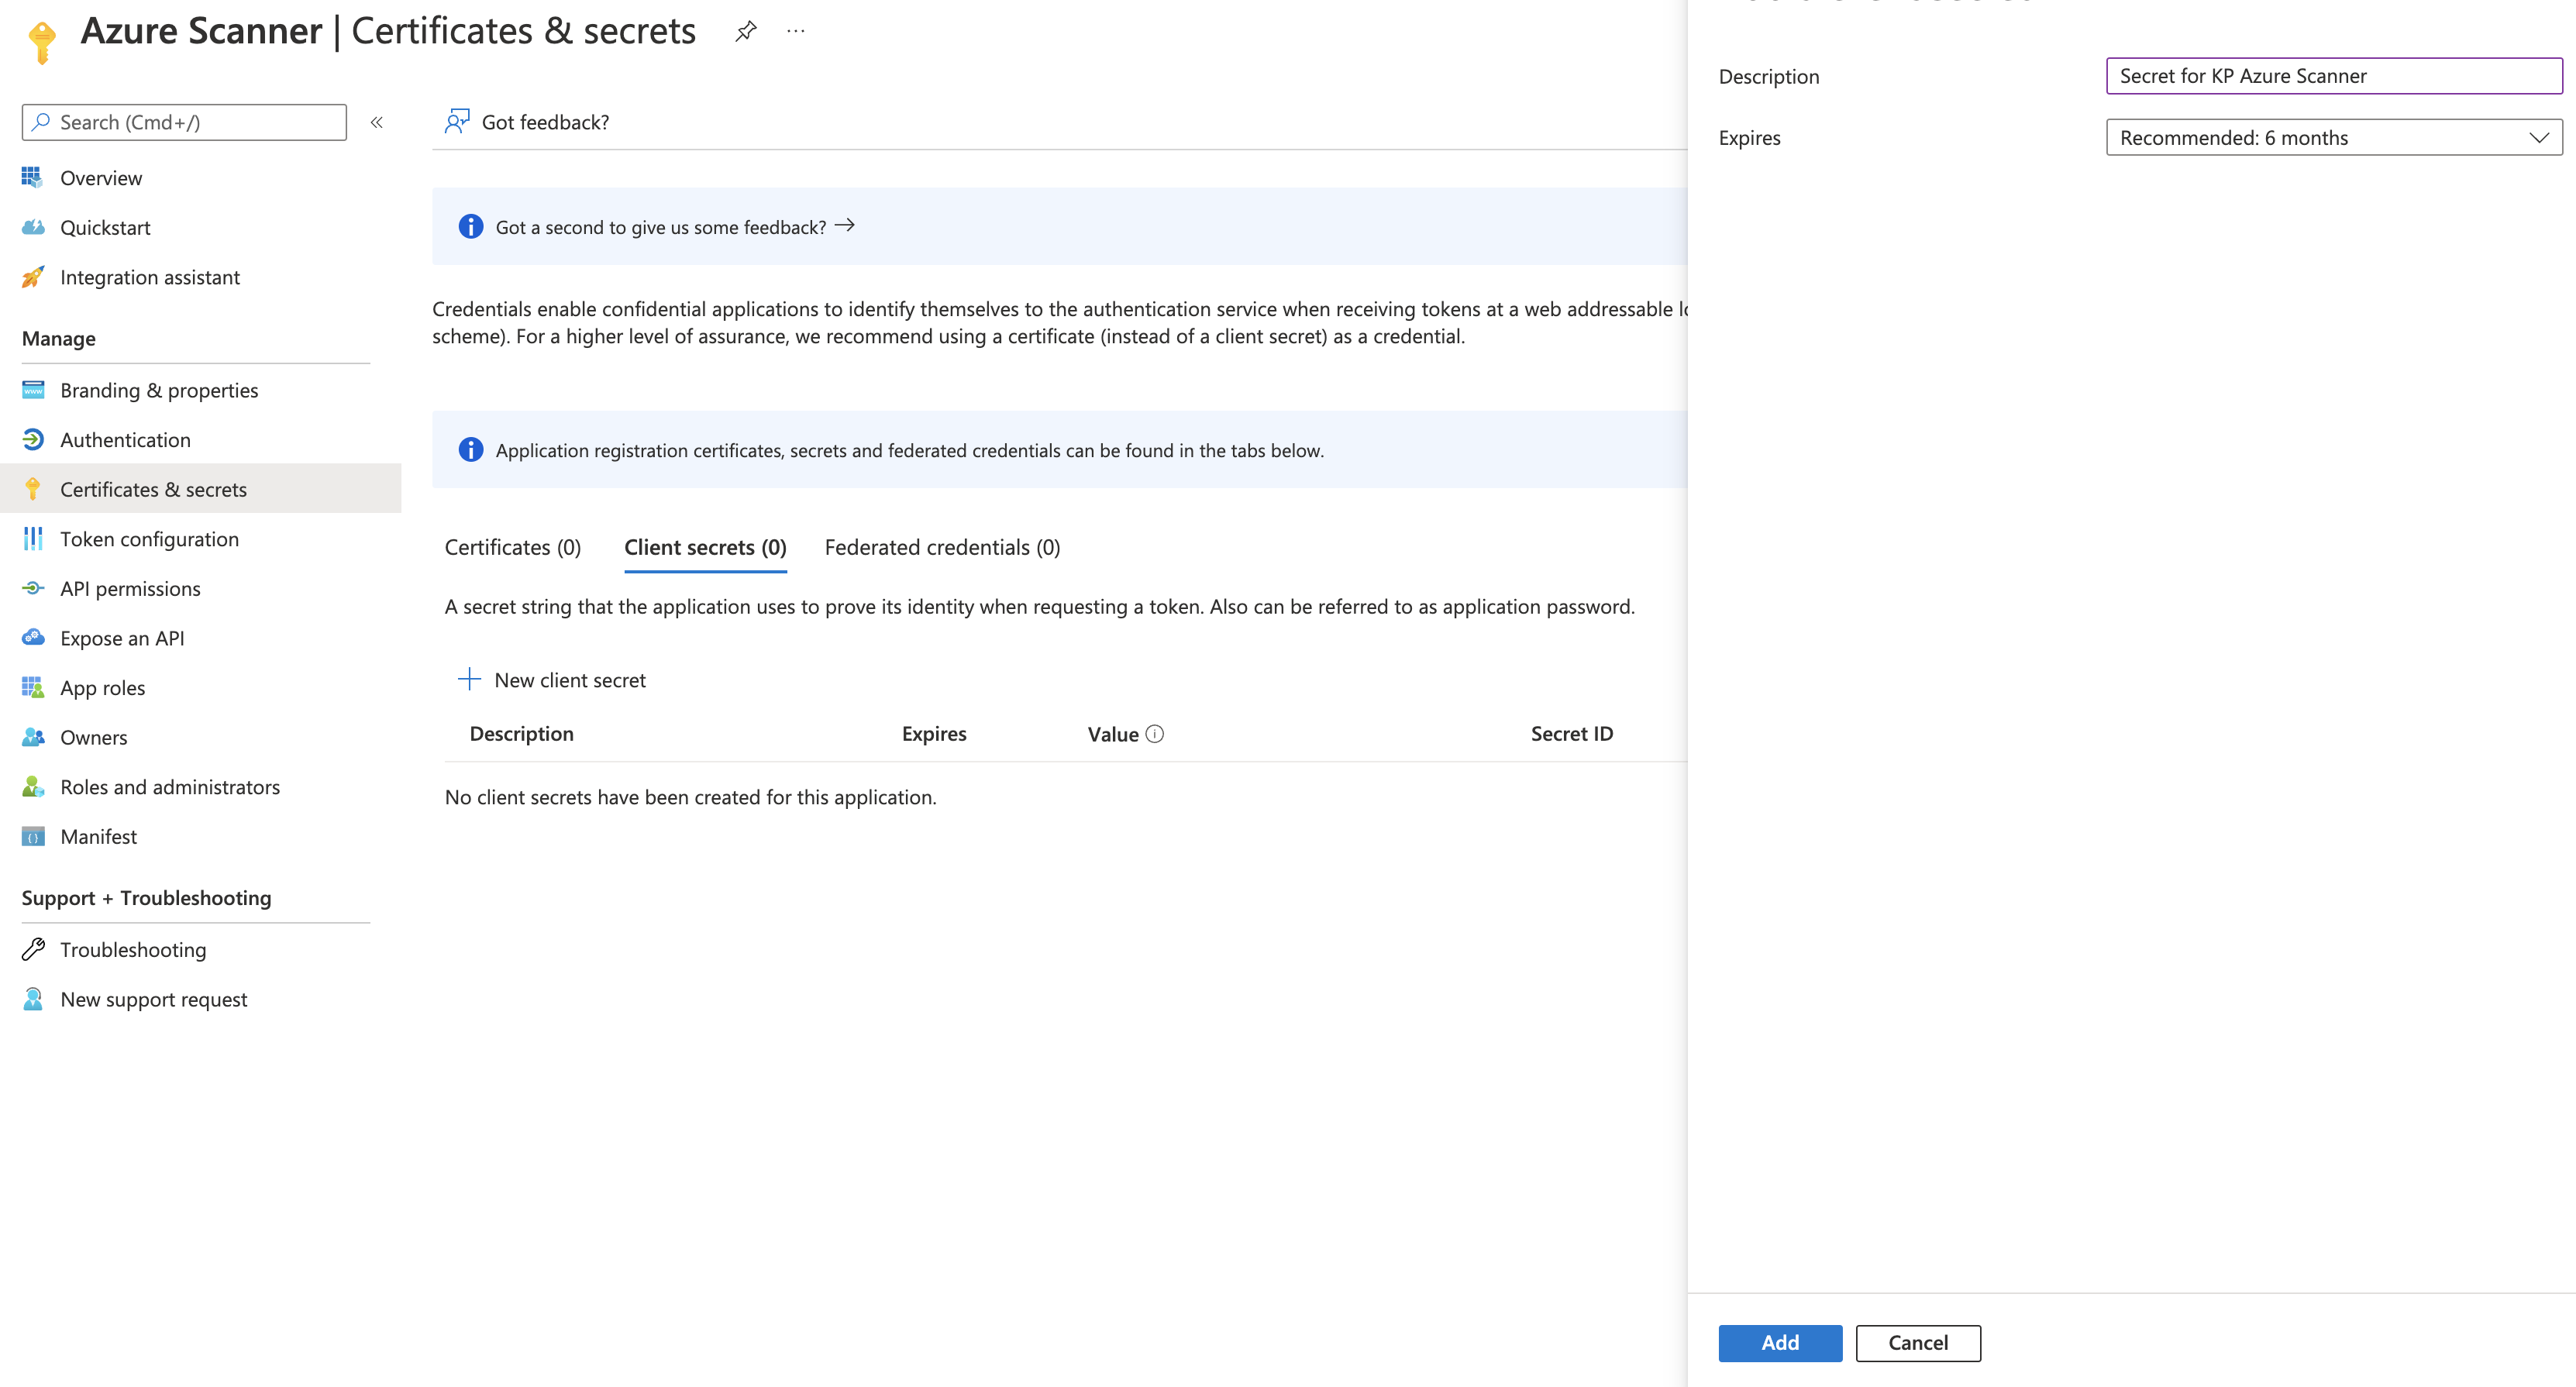
- Select Certificates & secrets from the menu on the left.
- Click on + New client secret.
- Enter "Secret for KP Azure Scanner" in the Description field.
- You can set an Expiration if desired for the secret.
- Click on Add.
- Copy the Value of the secret to your clipboard and enter it in the Client Secret field on the KirkpatrickPrice Connect Azure Account modal.
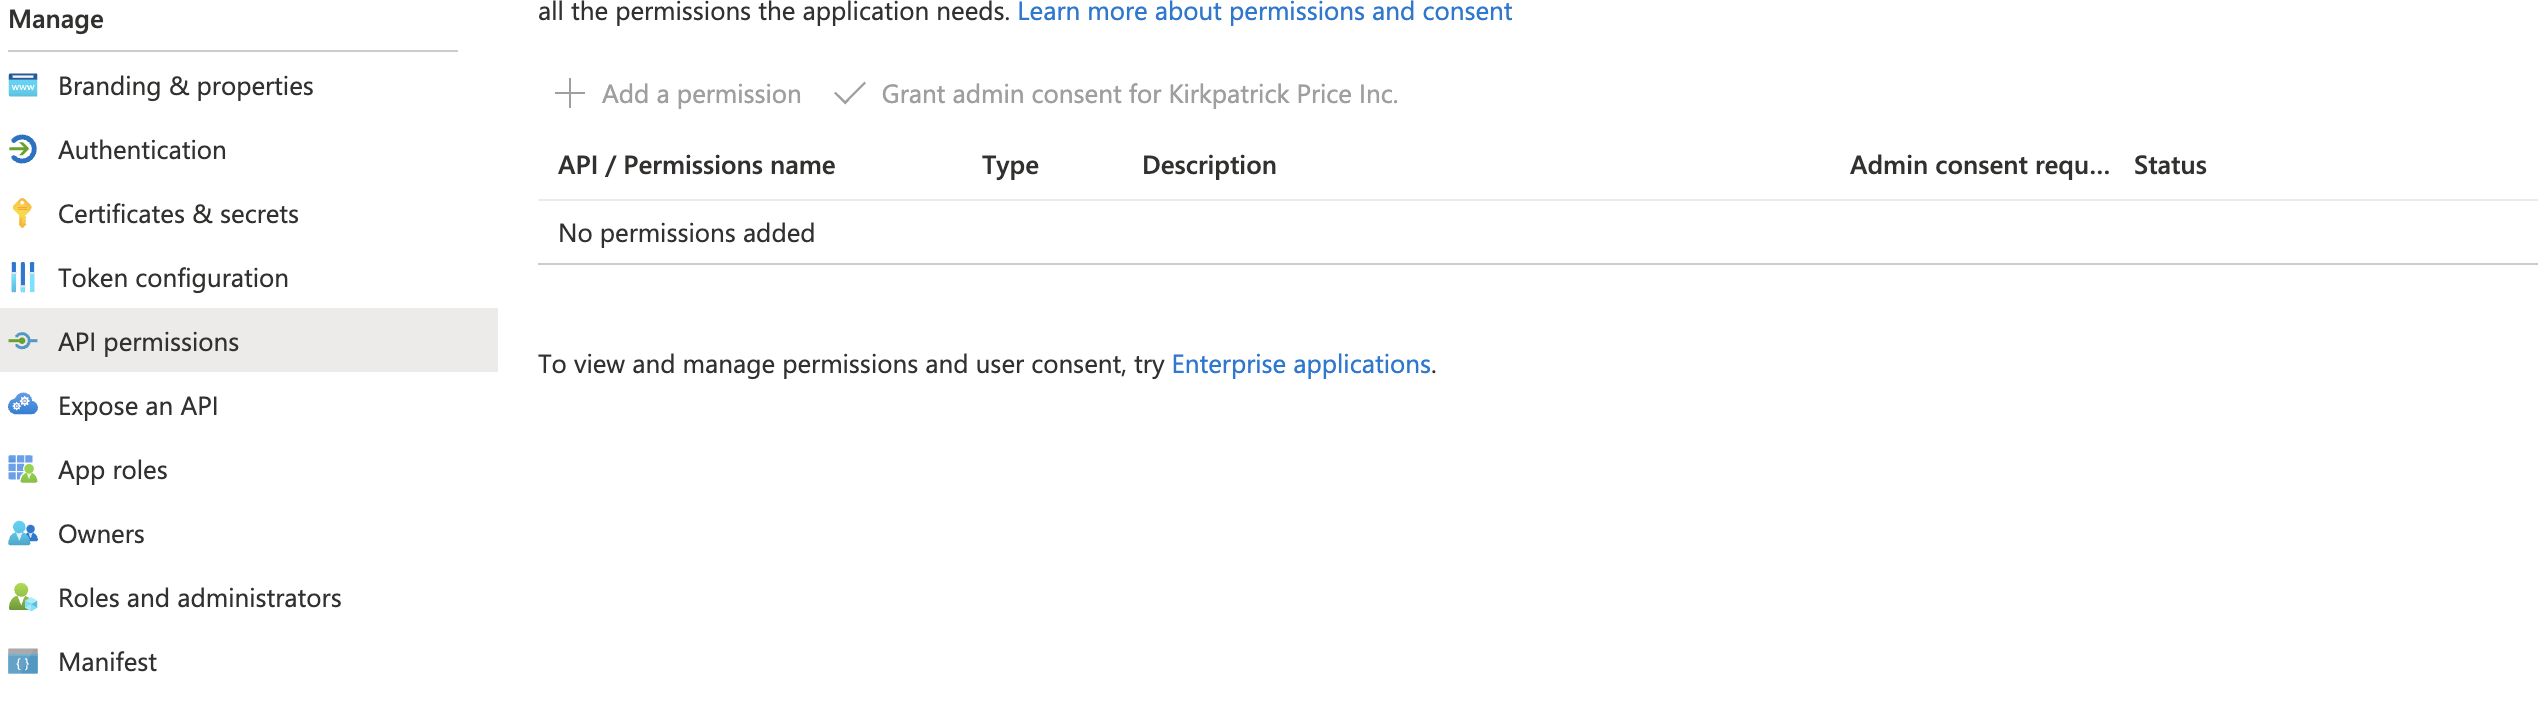
3. Add API Permissions
- Select API permissions from the menu on the left.
- Click on + Add a permission.
- Click on Microsoft Graph.
- Click on Application permissions.
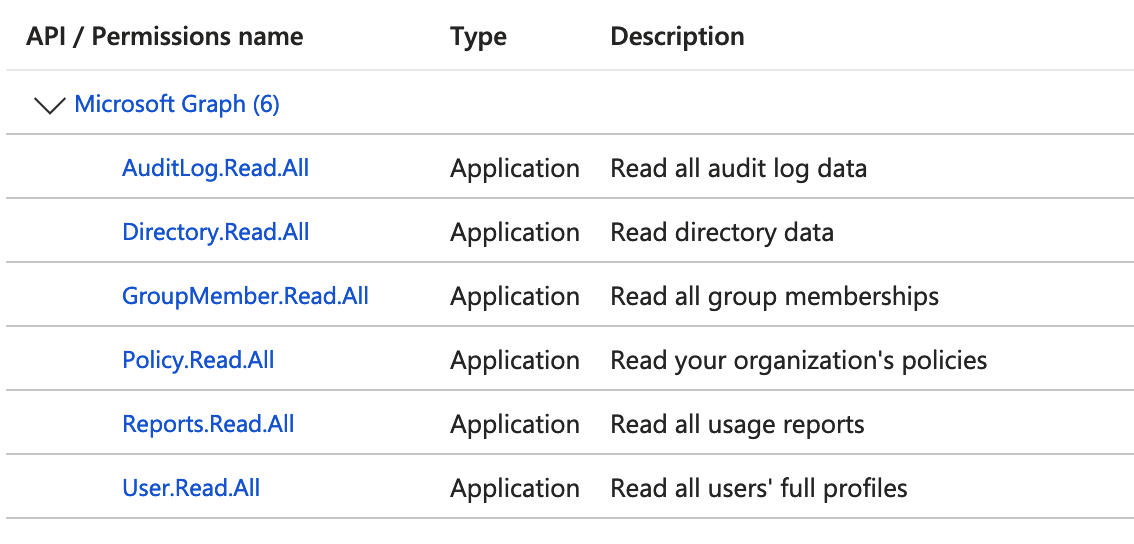
- Enter User.Read.All in the Select permissions search field.
- Click on the User menu at the bottom, check the User.Read.All option.
- Repeat the process for the following permissions: AuditLog.Read.All, Directory.Read.All, GroupMember.Read.All, Policy.Read.All, and Reports.Read.All
- Click on Add permissions
- Click on Grant admin consent for [YOUR TENANT NAME].
- Click on Yes in the Grant admin consent confirmation. dialog.
4. Assign the Reader Role
- Using the portal menu, navigate to All Services.
- Click on Subscriptions under the general section.
- Copy your active Subscription ID and enter it in the Subscription ID field on the KirkpatrickPrice Connect Azure Account modal.
- Click on your active subscription.
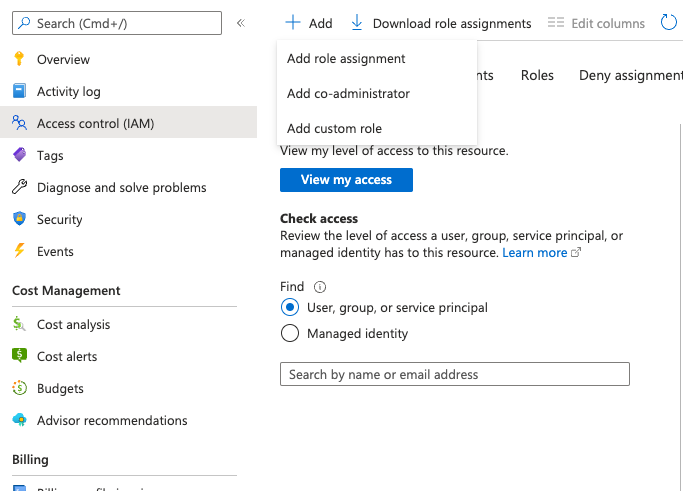
- Select Access control (IAM) from the menu on the left.
- Near the center of the menu click on + Add.
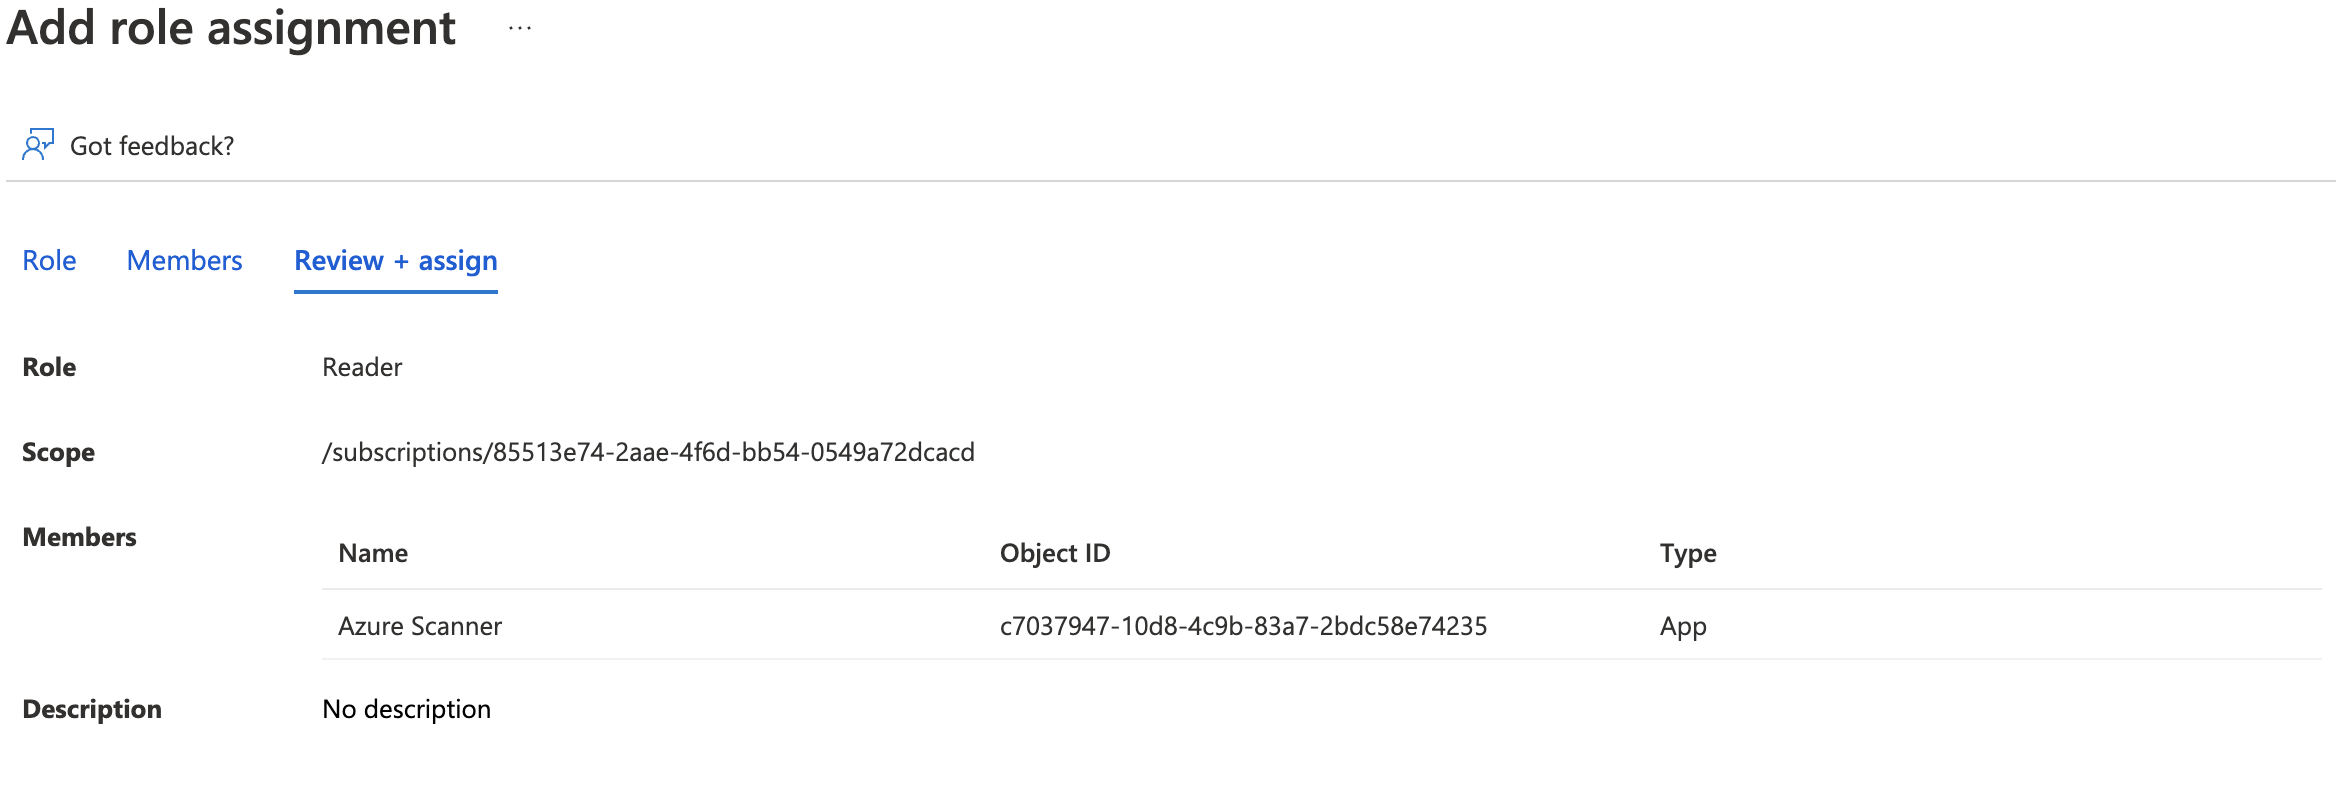
- From the dropdown, click on Add role assignment.
- Enter Reader in the search field to find the role.
- Once the results filter click on Reader.
- Click on the Members tab.
- Click on + Select members.
- In the menu on the right, enter Azure Scanner.
- Once the results filter click on Azure Scanner.
- Click on Select.
- Click on Review + Assign.
- On the KirkpatrickPrice Connect Azure Account modal, click Connect Account.