
Connect Your GCP Account
These steps require an active GCP subscription and the Google Cloud Shell.
1. Enable scanner APIs
- Navigate to the GCP Developer Console.
- Click Activate Cloud Shell near the top right of the menu.
- Enter the gcloud command in the Cloud Shell terminal to enable all required APIs.
3. Create Project IAM Role
- Enter the gcloud command in the Cloud Shell terminal to create a project role for our scanner.
gcloud iam roles create KPScanner --title=KPScanner --project="$GOOGLE_CLOUD_PROJECT" --description="Access to required resources to properly analyze the security posture of the environment" --permissions=cloudkms.cryptoKeys.get,cloudkms.cryptoKeys.getIamPolicy,cloudkms.cryptoKeys.list,cloudkms.keyRings.list,cloudsql.instances.get,cloudsql.instances.list,compute.firewalls.get,compute.firewalls.list,compute.instances.get,compute.instances.list,compute.networks.get,compute.networks.list,compute.projects.get,compute.regions.list,compute.sslPolicies.get,compute.sslPolicies.list,compute.subnetworks.get,compute.subnetworks.list,compute.targetHttpsProxies.get,compute.targetHttpsProxies.list,compute.zones.list,dns.managedZones.get,dns.managedZones.list,iam.serviceAccountKeys.list,iam.serviceAccounts.list,logging.logMetrics.list,logging.sinks.get,logging.sinks.list,monitoring.alertPolicies.list,resourcemanager.projects.get,resourcemanager.projects.getIamPolicy,storage.buckets.get,storage.buckets.getIamPolicy,storage.buckets.list4. Create Organization IAM Role
- Enter the gcloud command in the Cloud Shell terminal to create an organization role for our scanner.
- Note: This is only required if your project is associated with an organization.
[ -n "$PROJECT_ORGANIZATION_ID" ] && gcloud iam roles create KPOrgScanner --title="KPScanner - Organization Permissions" --organization="$PROJECT_ORGANIZATION_ID" --description="Access to required organization level resources to properly analyze the security posture of the environment" --permissions=resourcemanager.organizations.get,resourcemanager.projects.get,resourcemanager.projects.getIamPolicy,resourcemanager.folders.get5. Create Service Account
- Enter the gcloud command in the Cloud Shell terminal to create a service account in your project.
6. Assign the Project Role to the Service Account
- Enter the gcloud command in the Cloud Shell terminal to assign the project role we created to the service account we created.
7. Assign the Organization Role to the Service Account
- Enter the gcloud command in the Cloud Shell terminal to assign the organization role we created to the service account we created.
- Note: This is only required if your project is associated with an organization.
9. Create Workload Identity Provider
- Enter the gcloud command in the Cloud Shell terminal to create the Workload Identity Provider.
Log in to copy the Workload Identity Provider command
10. Assign the Service Account to the Identity Pool
- Enter the gcloud command in the Cloud Shell terminal to assign the Service Account we created to the Identity Pool we created.
gcloud iam service-accounts add-iam-policy-binding kp-gcp-scanner-service@$GOOGLE_CLOUD_PROJECT.iam.gserviceaccount.com --role=roles/iam.workloadIdentityUser --member="principalSet://iam.googleapis.com/projects/$(gcloud projects describe $GOOGLE_CLOUD_PROJECT --format=value\(projectNumber\))/locations/global/workloadIdentityPools/kp-gcp-scanner/*"11. Download Client Library Config
- Using the navigation menu near the top left, select IAM & Admin.
- Select Workload Identity Federation from the menu on the left.
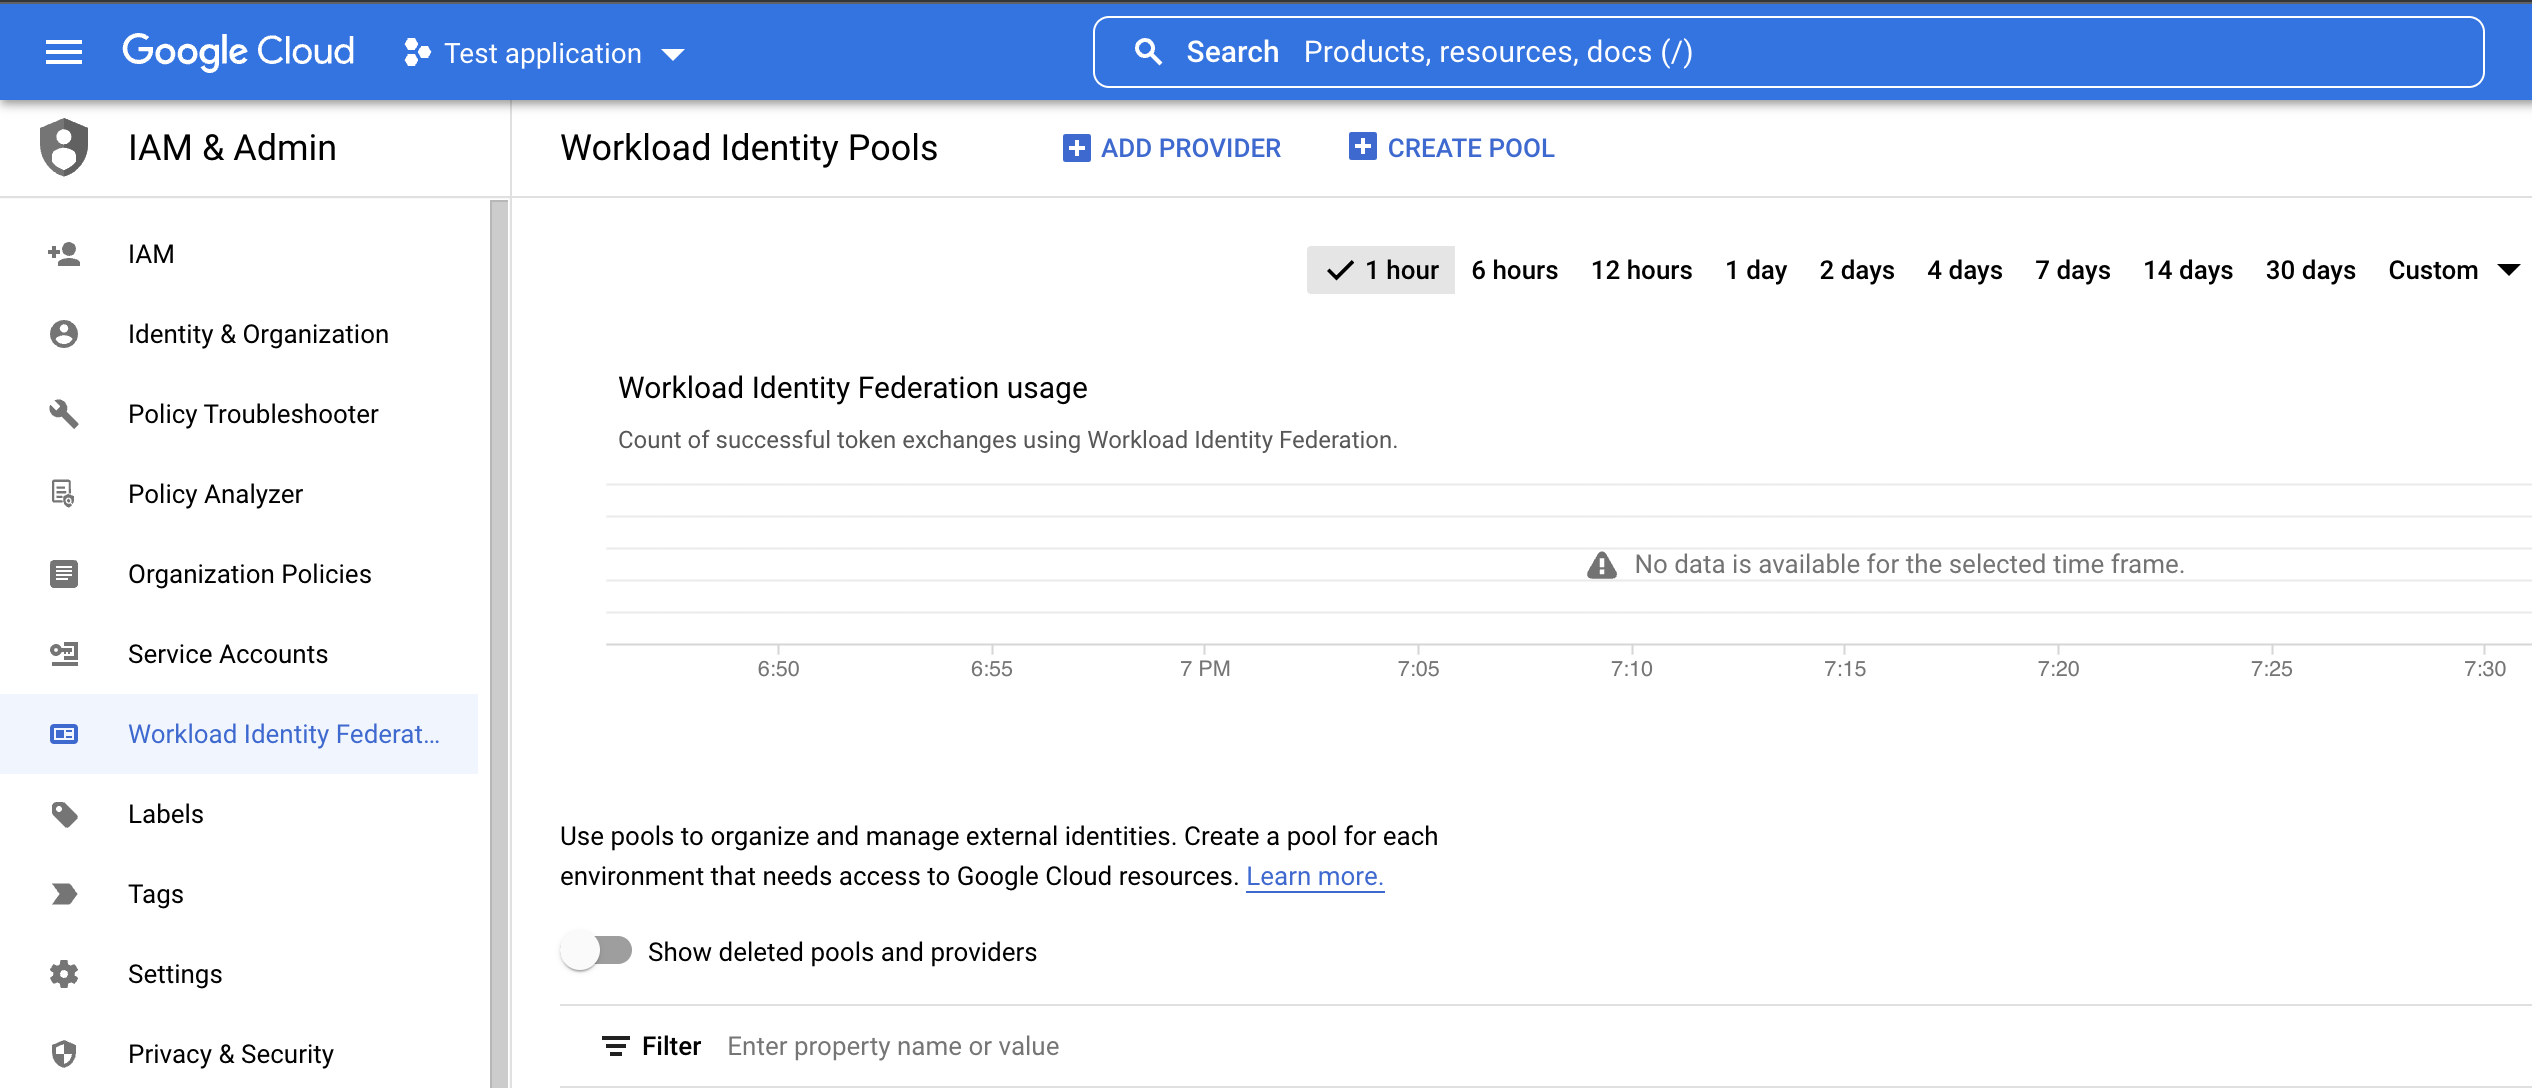
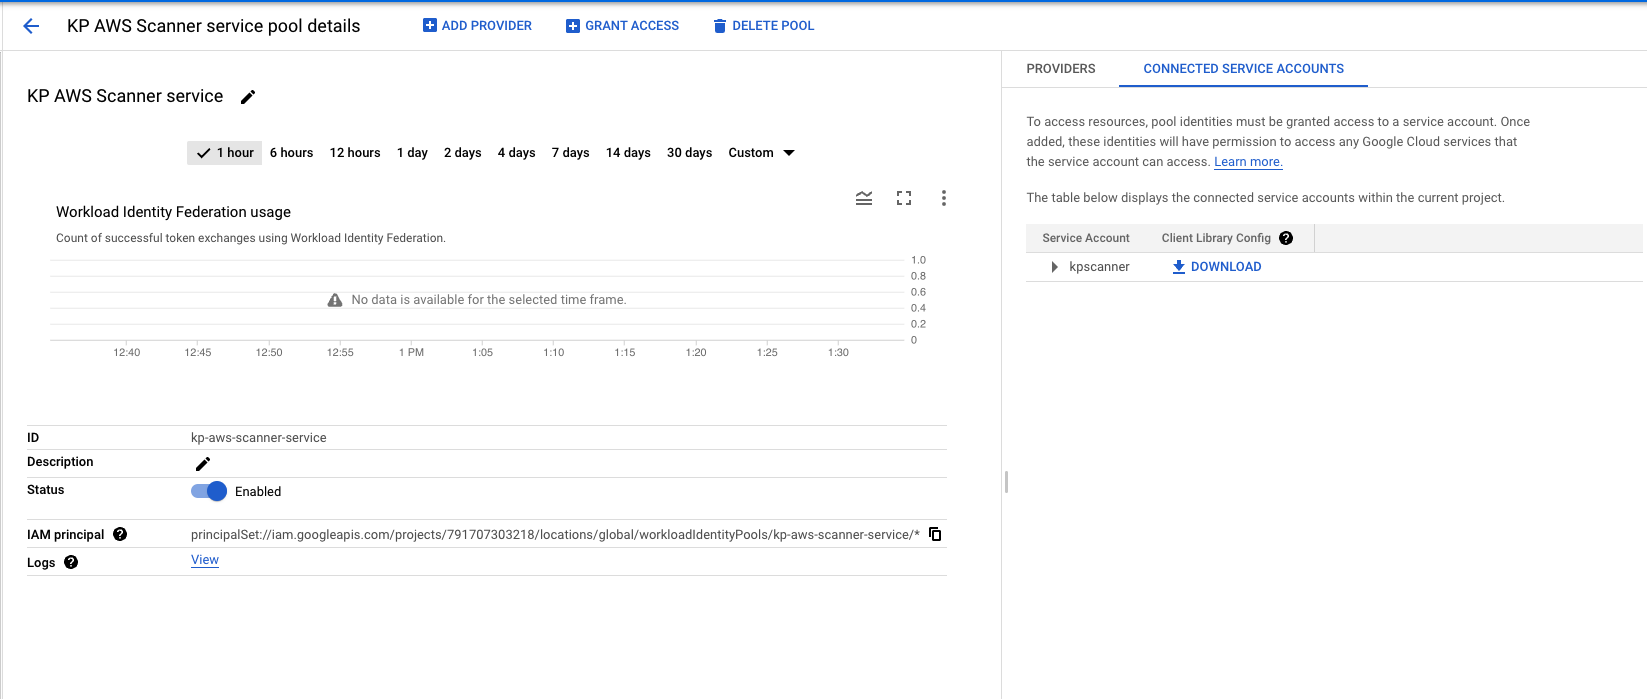
- Click on KP GCP Scanner to navigate to the pool details page.
- From the panel on the right side, click on the CONNECTED SERVICE ACCOUNTS tab.
- Download the Client Library Config file.
12. Enter your Credentials
- Return to the Connect GCP Account modal on the KirkpatrickPrice GCP Scanner site.
- Enter your Project ID in the field below.
- Upload the Client Library Config JSON file you downloaded using the Credential JSON field below.
- Click Connect Account.